


Autoflowering cannabis is becoming increasingly popular among hobbyists and professional growers. These special cannabis strains are characterized by their ability to flower regardless of the light cycle. This makes them ideal for novice growers and experienced growers alike. In this post, we explain step by step how you can successfully grow autoflowering cannabis.
What are autoflower cannabis strains?
Autoflowering strains are derived from the Cannabis Ruderalis plant, which occurs naturally in colder climates such as Russia and Eastern Europe. They have the unique ability to initiate flowering automatically, regardless of the hours of light, unlike photoperiod cannabis strains that require specific light cycles (e.g. 12 hours of light and 12 hours of darkness).
Benefits of autoflower cannabis:
-
Short life cycle: Most varieties are ready for harvest in 8-10 weeks.
-
Compact size: Ideal for small growing areas.
-
Easy maintenance: Less sensitive to faults and environmental conditions.
Required Equipment
To successfully grow autoflower cannabis, you need:
-
Seeds: High quality autoflower seeds from trusted seed banks.
-
Growing substrate: Light, well-drained soil or coconut fibers.
-
Lighting: LED or CFL lamps (at least 18 hours of light per day).
-
Pots: 10-15 litre fabric pots are ideal.
-
Nutrients: Special cannabis fertilizers for the growth and flowering phase.
-
Ventilation: Fans for air circulation and activated carbon filters for odor control.
-
Measuring instruments: pH and EC meters for controlling water and nutrient solution.
step-by-step instructions
1. Germination of seeds
-
Place the seeds between two damp paper towels and store them in a dark, warm place (20-25 °C).
-
After 24-72 hours the seeds should germinate and show small roots.
-
Carefully place the germinated seeds in small pots with potting soil.
2. The growth phase
-
Lighting: Autoflower plants do not require specific light cycles, but it is recommended to provide them with 18-20 hours of light per day.
-
Watering: Keep the soil moist but not wet. Allow the top layer of soil to dry slightly before watering again.
-
Nutrients: Start with a low fertilizer concentration (about 25% of the recommended amount) and increase it slowly.
-
Air circulation: Ensure constant air movement to avoid mold and pests.
3. The flowering phase
-
After about 3-4 weeks, the plant will automatically start to bloom. Now switch to a fertilizer that is rich in phosphorus and potassium.
-
Reduce the humidity to about 40-50% to prevent mold growth in the flowers.
-
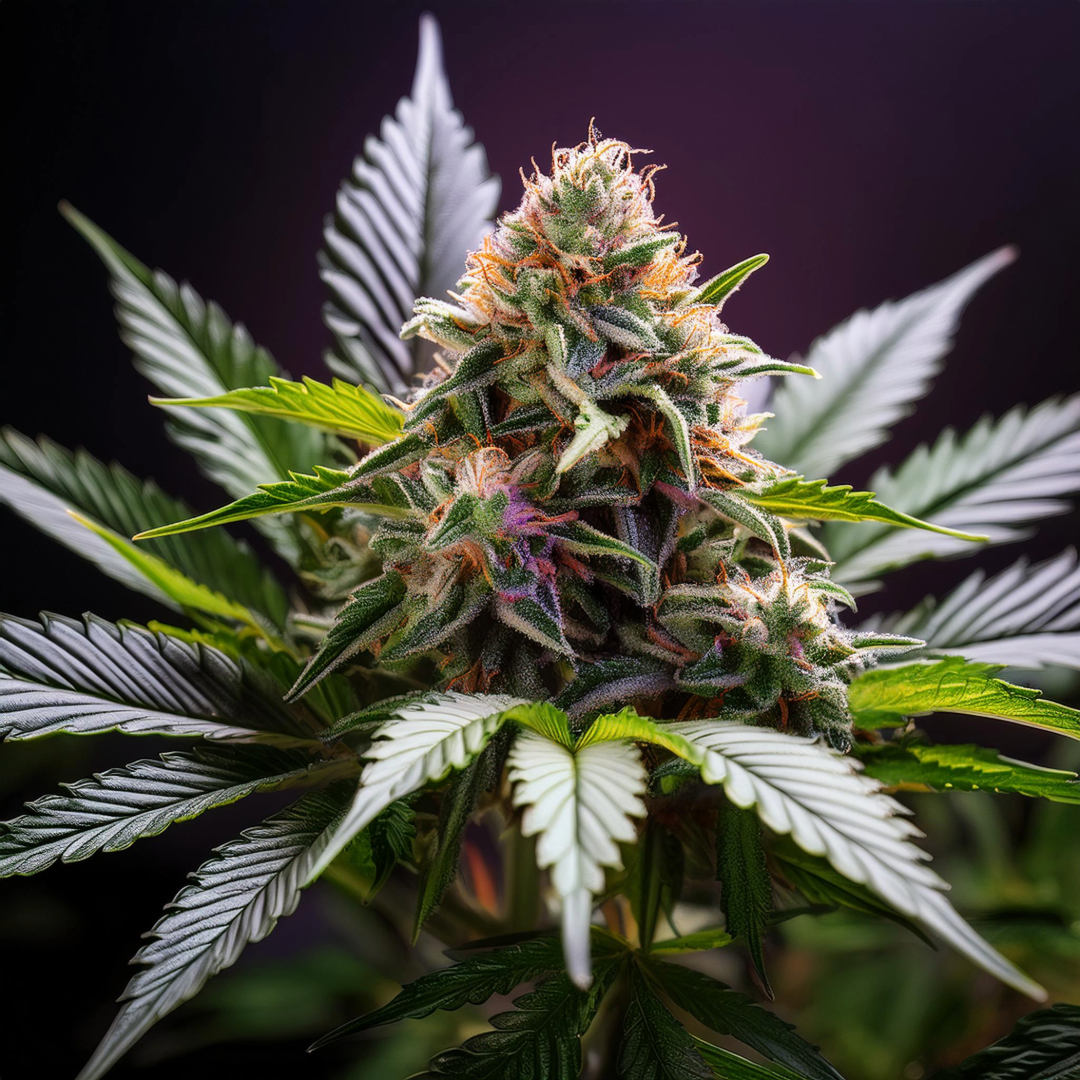
Observe the trichomes (resin bodies) with a magnifying glass. When they turn milky and amber, harvest time is near.
4th harvest
-
Cut the plant when about 70-90% of the trichomes have reached the desired color.
-
Hang the plant upside down in a dark, well-ventilated room to dry.
-
After 7-14 days, you can trim the flowers and store them in jars for curing.
Tips for Success
-
Avoid repotting: Autoflower plants have a short life cycle and are sensitive to stress.
-
Choose the right pot size: Fabric pots improve root aeration and promote healthy growth.
-
Constant conditions: Keep the temperature between 20-28 °C and the humidity within the recommended range.
Conclusion
Growing autoflower cannabis is an easy and rewarding way to produce high-quality buds at home. With proper preparation and care, you can grow healthy plants and get a bountiful harvest. Give it a try and enjoy the process!